HubSpot and Spotlightr can connect to turn your visitors into leads, and leads into fans, and then fans into customers.
Here’s how that happens…
You can generate more leads with your videos by adding opt-in forms right inside your videos. You can force the opt-in to watch the video, or make it optional. Leads go right from your video to your HubSpot account.
Take those leads and email them personalized video content. Include their name, company, position, or any type of data that you collected when they opted into your list.
Then track those personalized video views. You can track your lead’s video usage, see what they’re watching, how much they are watching, and move them into different sales funnels and lists based on that usage.
Let’s go through the entire journey your customers will take from the moment they land on one of the videos on your website.
Add HubSpot Integration
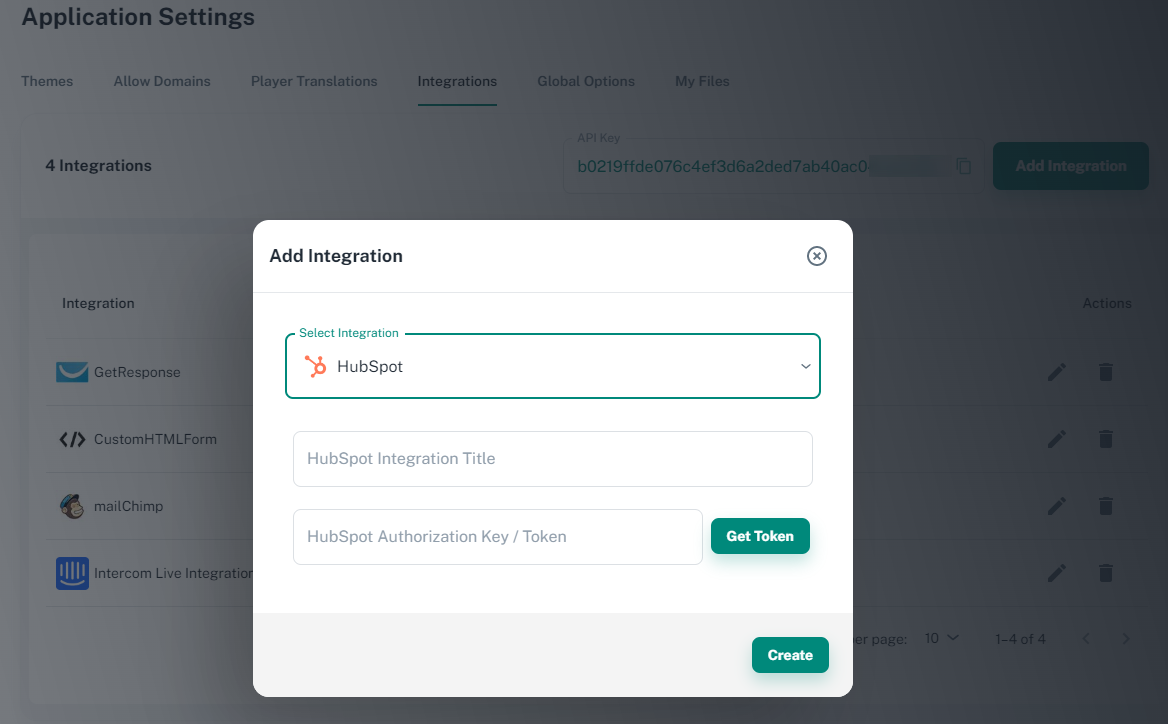
First you need to integrate your HubSpot account with Spotlightr. This step is super simple. Just go to your App Settings, then Integrations, and then add HubSpot. If you’ve done this stuff before you’ll breeze through. If you’d like to see the steps check our knowledge base article.
Add Opt-in Form
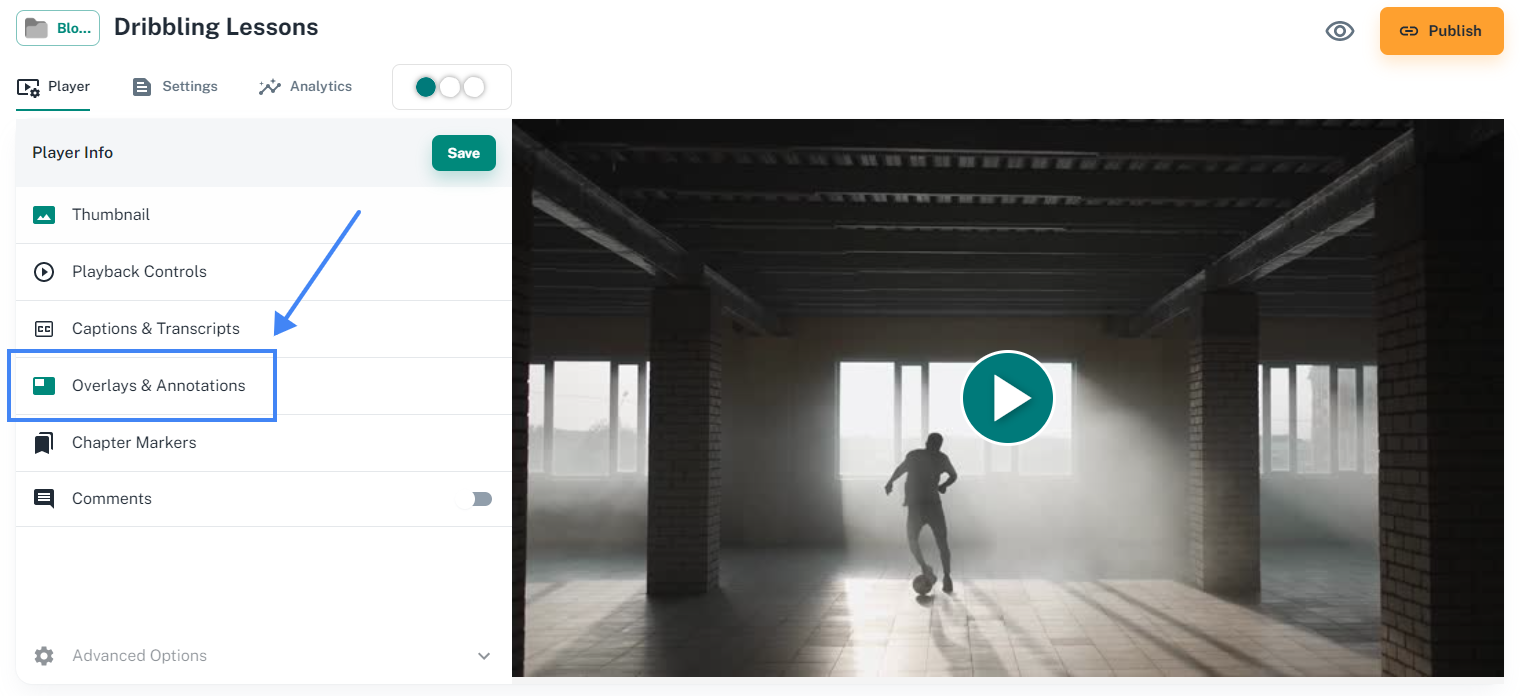
Let’s get your form up on your video so you can collect leads. Now we’ll head over to the video you want to use and go to your Overlays.
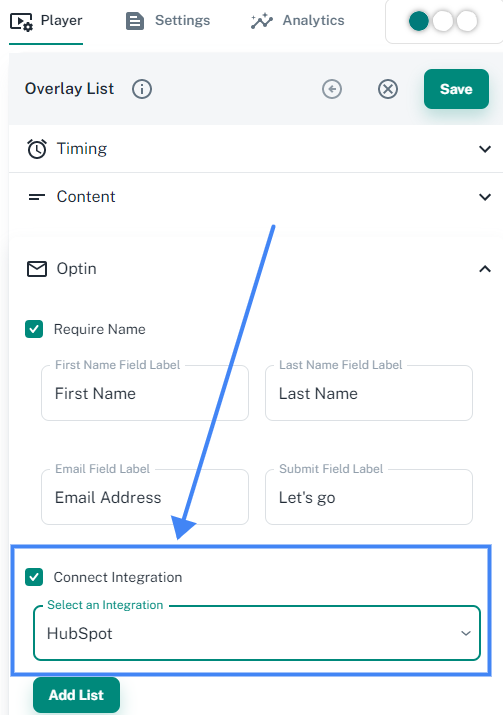
Once that’s configured, we have a form that looks like this:
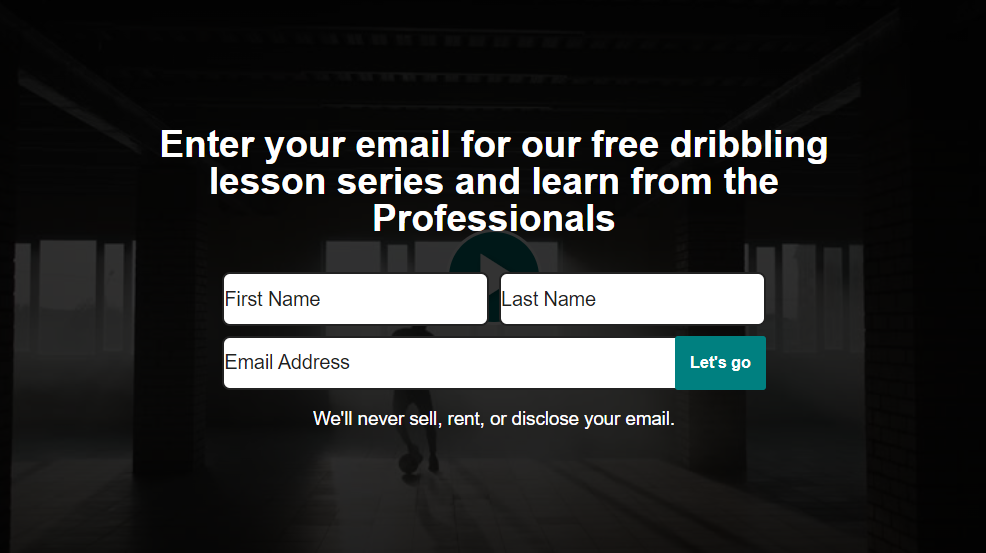
Let’s get one started. We’ll load this watch page and opt-in as a new lead interested in a free video lesson series.
Here’s the page: https://spotlightrteam.cdn.spotlightr.com/watch/MTM5MDgxOQ==
We’ll opt-in with name Ted Williams with email ted@baseballgreats.com. Here’s our new lead.
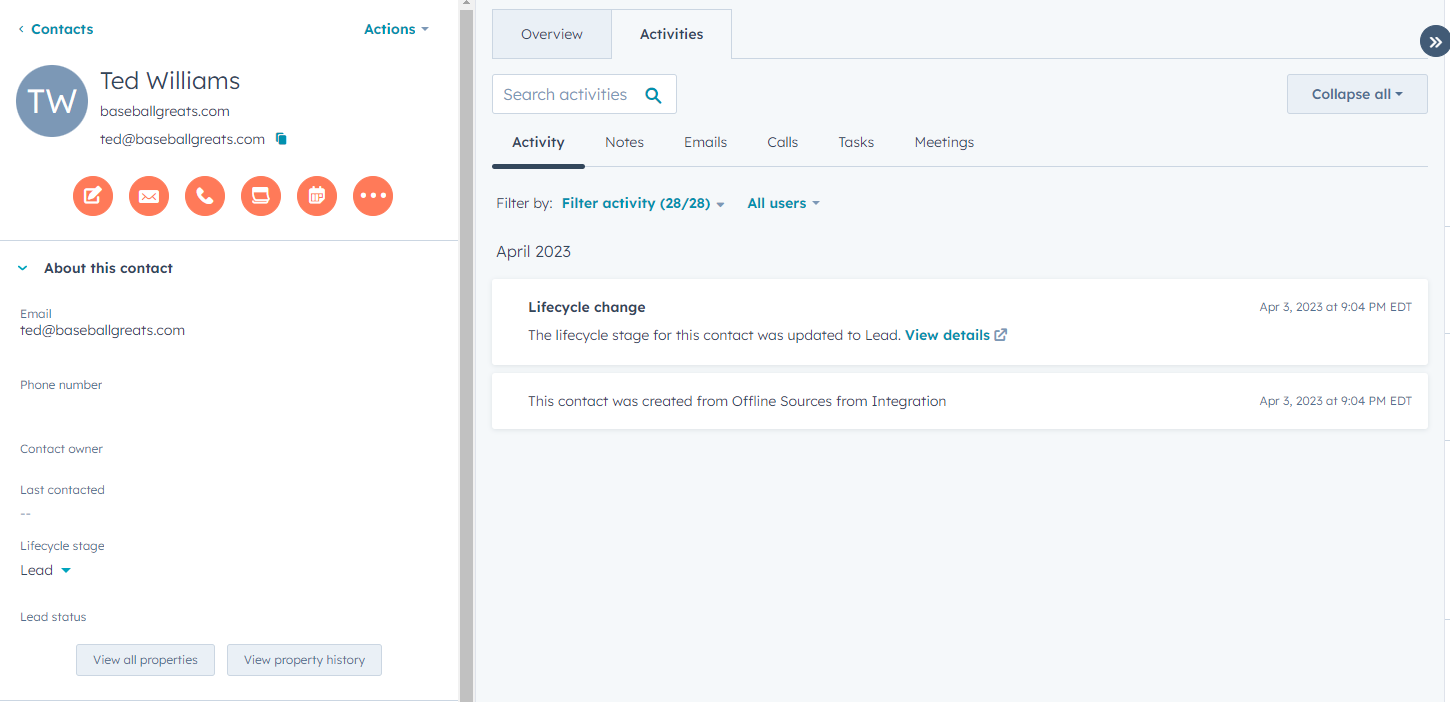
HubSpot Workflows & Lists
A quick note on your new leads coming from Spotlightr opt-in templates. If you haven’t yet, you’ll need to create a new List inside of HubSpot where you will add new leads to. Then you’ll set up a workflow to send your new leads their automated emails.
In this example, I’ve created a new List called “Free Video Series” and here I will add any new opt-ins.
When you create a List, you need to filter values in order to tell HubSpot which contacts to add to the list. There are countless ways to configure this. In this example, anyone with a Lifecycle that has “Lead” will be added to this List.

Add Personalization
OK now leads are coming into your CRM. As you promised on the opt0in overlay, you are going to send them a free series of lessons. We’re targeting parents who have children that play soccer, and we have 5 video lessons in this free video series.
Let’s go ahead and add personalization to these videos.
Enable Personalization On The Video
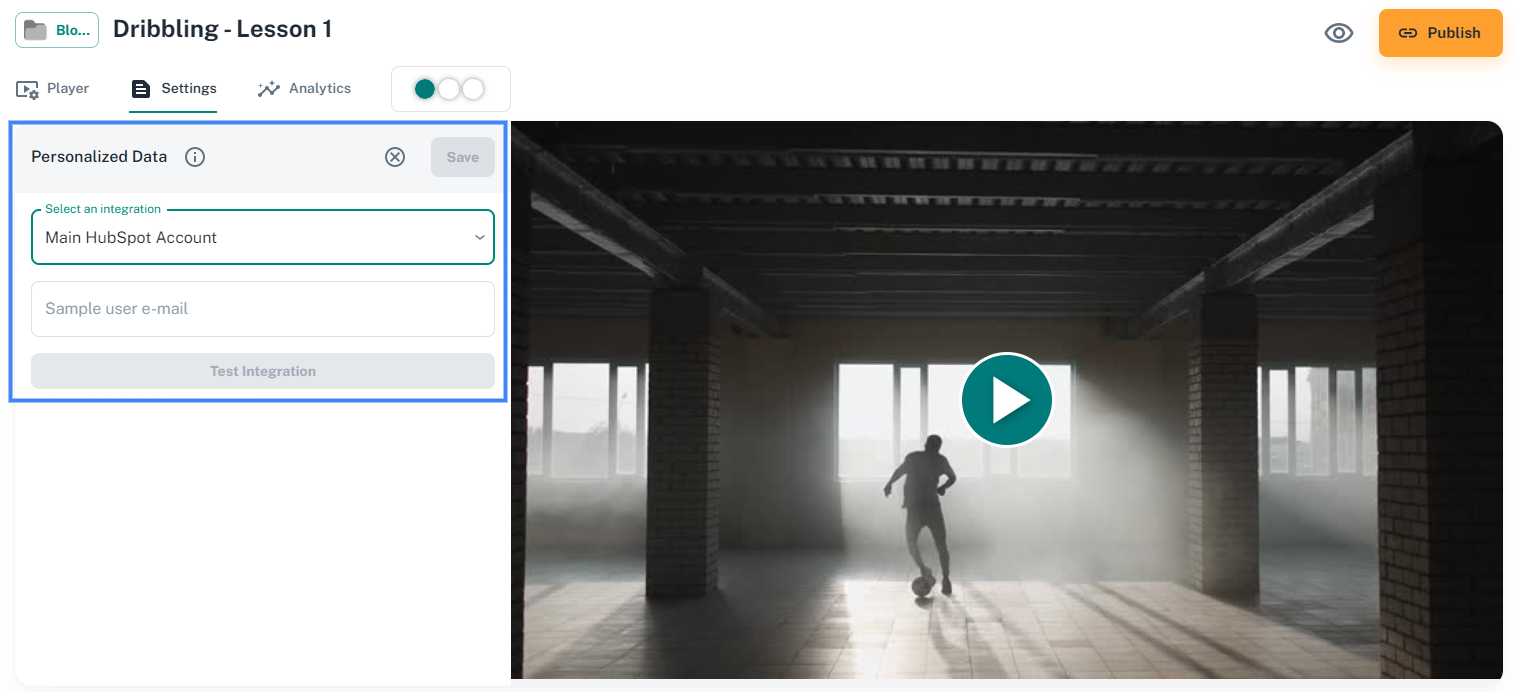
I’m going to head over to Lesson 1 and turn personalization on in the video settings with the HubSpot integration. All you are doing here is selecting your integration you’ve already configured in your account.
The next step is just to test your integration to make sure things look good. So you’ll add an email address you know you have in your CRM. You’ll test the integration with this email, which will bring back all the data you have on this person. When it returns data on that email, like their name or company, then you know things are working.
If you’d like to see the step by step instructions on this, check our knowledge base article.
Add The Personalized Overlays
When you add personalization, this means you can add any value that you have in your CRM to your overlays. So if your contacts in your CRM have first name, last name, email address, company name, position, phone number, etc..any of these values can be added to your overlays on your videos.
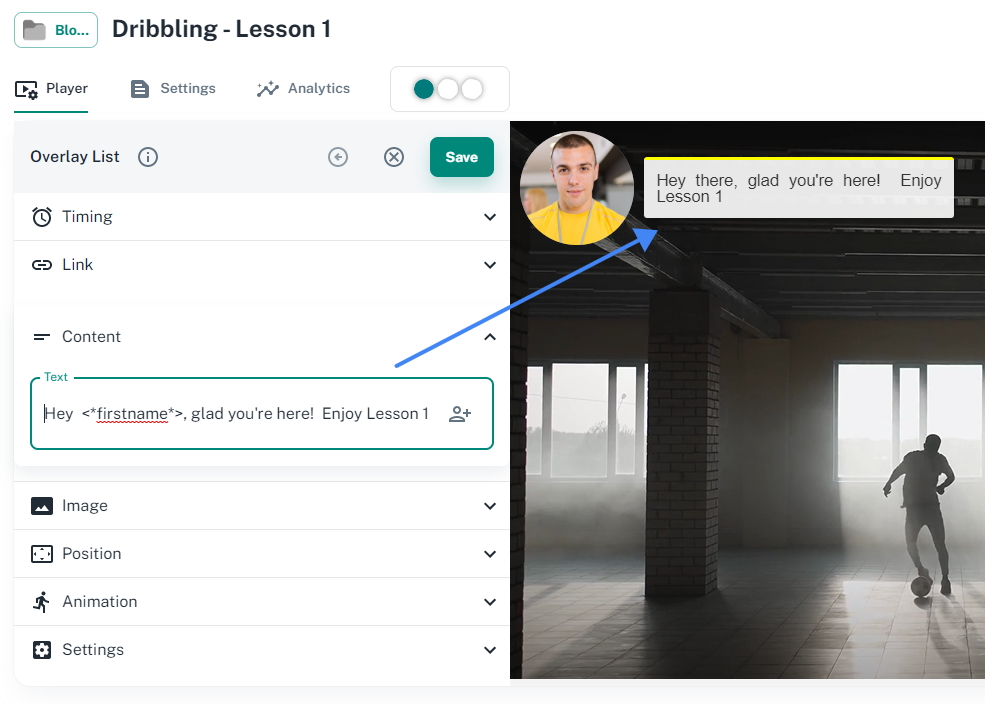
Now I want to add an overlay to the video welcoming my lead by name to the first video in the series. The overlay will say something like:
“Hey Ted, glad you’re here! Enjoy Lesson 1”
Similar to the opt-in overly, I”m goind to head over to my overlays but this time I’m going to use a Notebox template with image.
These are super easy to set up. I’m going to configure the following…
1. Timing – When do I want the overlay to appear? In this case at second :01
2. Content – As mentioned above, this will be a welcome message
3. Personalization option – In that content, I will add a variable for the value I want to bring over from HubSpot. In this case the value is ‘firstname’. If no value can be found, I specified to use “there” instead of the name. So if the name can’t be found for some reason, it will say “Hey there” instead of just “Hey ”
4. Uploaded an image. In this example we are using an image of the coach
That’s it. If you want the steps please check this knowledgebase article.
Here’s how that looks inside of Spotlightr. You can preview the whole thing while you set it up.
Let’s See How That Looks
When you send out your emails to your leads to watch videos, you just need to append a variable at the end. That variable is: ?personalized=email@domain.com
In this example, ted@baseballgreats.com is our lead in HubSpot. So the variable will return a value of “Ted” for the overlay.
Here’s the link: https://spotlightrteam.cdn.spotlightr.com/watch/MTM5MDgyNw==?personalized=ted@baseballgreats.com
But if you click this one, it will default back to using ‘Hey there’: https://spotlightrteam.cdn.spotlightr.com/watch/MTM5MDgyNw==
Configure The Email In HubSpot
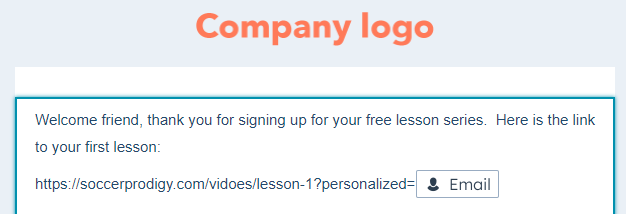
We just mentioned above that when you send your emails, you just append your lead’s email address at the end of the URL. HubSpot, and any CRM/ESP, will be able to dynamically change that email address to the person you are sending it to. HubSpot just so happens to also call it personalize your content.
Let’s pretend your domain is soccerprodigy.com and you have your lesson 1 video on this page: https://soccerprodigy.com/vidoes/lesson-1
Here’s how that will look inside of HubSpot when you append the receiver’s email address with the variable at thee of the URL:
Tagging Leads With Viewing Information
OK just to review what we’ve done so far…
– We integrated our HubSpot account with Spotlightr
– We set up our web page(s) with videos that have opt-in forms that collect leads, which go right to our HubSpot account
– We added personalization to our video series
Now let’s continue this customer journey by tagging them when they watch certain videos, and certain parts of videos.
So for example, if you want to tag your lead when they watched 75% of Lesson 1 you can do that. If the lead only watched the first half of the video they won’t be tagged. They will only be tagged if they wantch 75% or more.
Here’s how to do that…
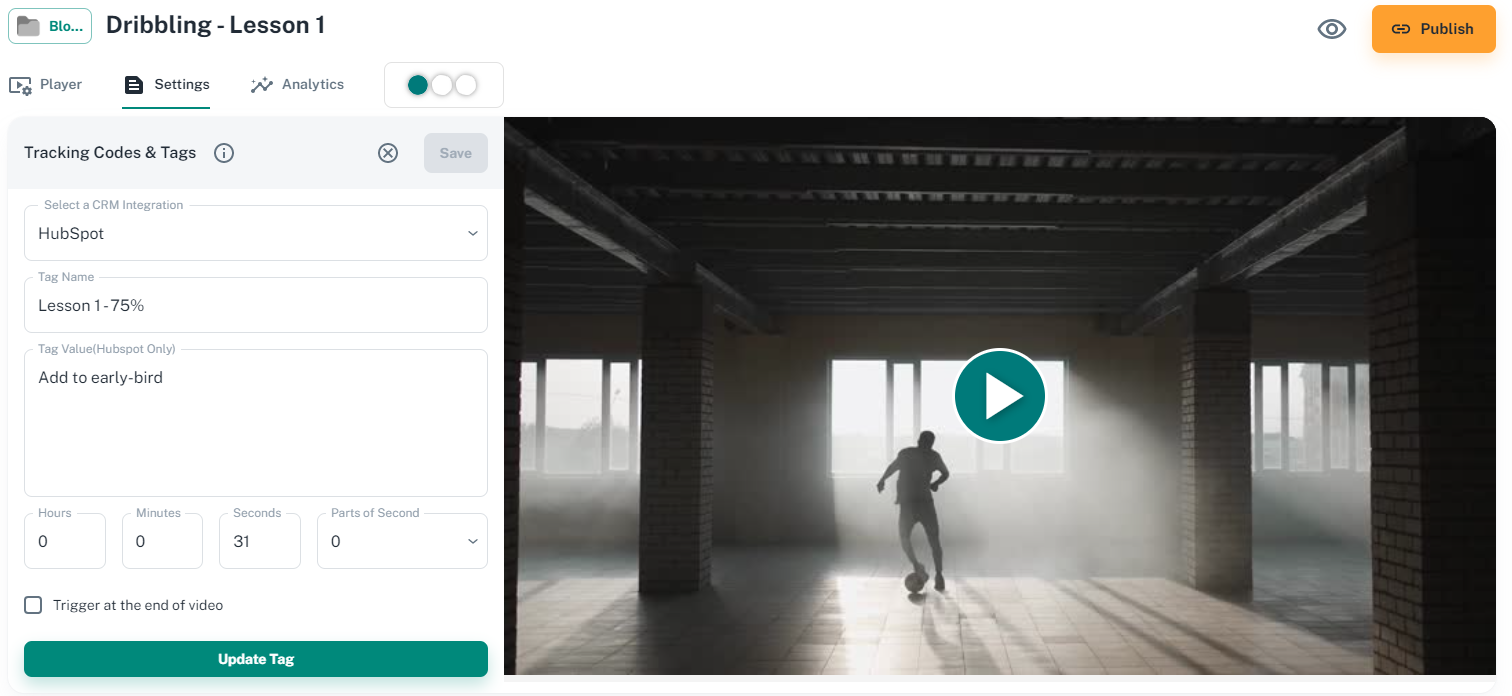
In this example, my Tag Name is “Lesson 1 – 75%” and my Tag Value is “Add to early-bird”. Think of the Value as a way to add more context to your Name. Or you can use it so that you can use the same Tag Name but different Values.
For example, I might want to use the same Tag Namer “Lesson 1 – 75%” with another tag but the Value is “Add to new announcements”. I will use this information to add this Contact to different Lists in HubSpot. And each List will get different emails sent to them that I create via workflows.
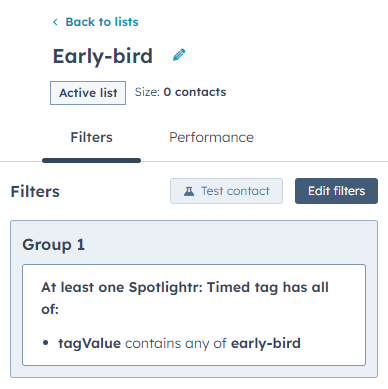
I created a List in Hubspot called “Early bird” and in this list I will add anyone that watch 75% of my Lesson 1 video. Since I know they are interested because they watched almost the entire first video, I will offer them an early-bird special offer on my paid program.
Here is the List I set up:

And there you have it. From random internet traffic to customer. Of course this was all just one example of how you can set this up. With the combined flexibility of Spotlightr and HubSpot, you can do some pretty amazing stuff with your video content and your CRM.
If you have any question on how you can use Spotlightr with HubSpot for your particular use-case, please don’t hesitate to reach out to our support team.
Give Your Customers A Better, More Personalized Journey
Discover why Spotlightr is the number one choice for course
creators and everyone in the e-learning space.
Sign up for a free 14 day trial, no credit card required. We’re the only video host that
supports your courses, your marketing funnels, and your budget.

